The North Texas Homeowner’s Guide to Buying an HVAC System
Everything you need to know before you spend $10,000–$20,000 on new heating and cooling.
Buying a new HVAC system is probably the most expensive appliance decision you’ll make as a homeowner. In North Texas, it’s also one of the most important—when the heat index hits 110°F in July, your AC isn’t optional.
The problem is that most homeowners go into this purchase without a real framework. The industry is full of brand loyalty, technical jargon, and salespeople who are more focused on margin than on matching you with the right system for your home and your budget.
This guide is Roy and Danielle Cook’s honest breakdown of what actually matters—and what doesn’t. No upsell. No jargon. Just the straight story from people who work on these systems every day.
Already wondering whether to repair or replace? Before you go further, you may want to start with our dedicated guide on that decision specifically. It covers the pressure tactics to watch for, the real math behind repair vs. replacement, and how to tell a legitimate recommendation from a sales push.
Read: HVAC Repair vs. Replace — No Sweat’s Honest Framework for DFW Homeowners →
What’s in This Guide
- Repair or Replace? How to Think About the Decision
- Types of Systems: AC vs. Heat Pump
- Efficiency and Staging: Single Stage, Two Stage, and Variable Speed
- Furnace Options: Standard vs. High Efficiency
- Brand Guide: The Honest Truth About Names
- Airflow: The Hidden Factor That Makes or Breaks Your System
- Air Quality: What Actually Works (and What Doesn’t)
- Installation: Why It Matters More Than the Equipment
- The No Sweat Warranty
- Maintenance: Protecting Your Investment
- DIY Maintenance Tips
- Whole-Home Energy Analysis
1. Repair or Replace?
This is often the first question we get—and it’s rarely a simple yes or no. The right answer depends on the age of your system, its maintenance history, how reliable it’s been, and the cost of the repair versus the cost of a new system.
A useful starting point: we like to see systems reach at least 15 years. That’s what a well- maintained North Texas system should achieve.
When a system falls short of that, the cause is almost always one of three things: it was never maintained properly, it was installed poorly to begin with, or someone replaced it before they needed to.
Here’s the general framework we use:
| Situation | What We Typically Recommend |
|---|---|
| Under 10 years old, isolated repair | Repair it. A well-maintained younger system has a lot of life left. Don’t let anyone tell you otherwise. |
| 10–12 years old, repair under $1,000 | Probably still worth repairing—especially if the system has been maintained and hasn’t had recurring issues. |
| 10–12 years old, repair $1,500+ | Run the math. Compare the repair cost against a new system with a 10-year warranty. The new system may make sense—but only if your current unit is already struggling. |
| 13+ years, major component failure | Replacement is likely the smarter move. A compressor or heat exchanger failure on an older out-of-warranty system can cost nearly as much as a new system. |
| Any age, recurring breakdowns | Add up what you’ve spent on repairs in the past two years. If it’s approaching $1,500–2,000, that money is better applied toward something new. |
The Rule of 5000 — and Why We Reject It
You may have heard this formula: multiply the age of your system by the repair cost. If the result exceeds $5,000, replace it.
We don’t use it—because it was designed to sell systems, not help homeowners. It ignores maintenance history, installation quality, and the actual condition of the unit. A 12-year-old system that’s been cleaned every year often outperforms a 7-year-old neglected one.
The Rule of 5000 should never be the sole reason you replace your system.
2. Types of Systems: AC vs. Heat Pump
There are two main types of HVAC systems, defined by what sits outside your home: a standard air conditioning condenser or a heat pump. Understanding the difference is the first step in making the right purchase.
Air Conditioner + Furnace
The most common setup in North Texas. The outdoor unit cools your home in the summer; the indoor gas furnace handles heat in the winter.
If your home has natural gas service from a utility provider, this is almost always the most cost-effective option. Gas heat is efficient, reliable, and inexpensive to operate compared to electric alternatives.
Heat Pump
A heat pump is essentially an air conditioner that can run in reverse—it moves heat out of your home in summer and pulls heat in from outside air during winter.
Heat pumps are paired with an indoor air handler that includes a blower, evaporator coil, and electric heat strips as a backup.
A heat pump is generally the better choice if your home runs on propane gas or is all-electric. Both propane heating and electric heat strips are expensive to operate. A heat pump is the most efficient form of electric heating available.
Heat pumps can also be paired with a gas furnace—a setup called a “dual fuel” system—but this is less common and typically only makes sense in homes using propane.
How to Tell What You Have Now
- Look for a gas line or a metal flue pipe connected to your indoor unit. Either one indicates you have a gas furnace.
- Look through the top grille of your outdoor unit. A heat pump has a reversing valve—a component about the size of a fist with copper lines running to it. An air conditioner does not have one.
- You can also Google the model number on the data plate of your outdoor unit. Search the model number and the results will tell you whether it’s a heat pump or an air conditioner.
- If you’re still not sure, give us a call. We can identify your system type in about 30 seconds.
3. Efficiency and Staging
Once you’ve decided on system type, the next decision is efficiency level. There are three main categories, each with meaningful differences in comfort, noise, and operating cost.
| Single Stage | Two Stage | Variable Speed | |
|---|---|---|---|
| How it works | On or off—full power every time it runs. | Two settings: low (65% capacity) and high (100%). | Continuously adjusts from 25% up to full capacity based on what the home needs. |
| SEER2 efficiency | Baseline | +1 to 2 points | +4 to 10 points |
| Humidity removal | Standard | Better than single stage | Up to 3x more effective than single stage |
| Noise level | Noticeable on startup and shutdown | Quieter—runs on low most of the time | Extremely quiet—you often won’t hear it cycle |
| Humidity control | On/off only | Improved in low stage | Set a target humidity level for your home |
| Best for | Budget-conscious buyers, rental properties, basic comfort needs | Homeowners wanting better comfort and efficiency without top-tier cost | Homeowners who want maximum comfort, quiet operation, and the best air quality |
What Does SEER2 Mean for Your Electric Bill?
SEER2 is the efficiency rating for air conditioning systems—the higher the number, the less electricity the system uses to produce the same amount of cooling.
As a practical rule of thumb, each additional SEER2 point reduces your electric bill by roughly $15–$25 per month during the cooling season.
The honest math: if your decision is purely financial, the efficiency upgrade rarely pays for itself in energy savings alone. The break-even point over the life of the system is roughly a wash.
The real reason to buy a higher-efficiency system is comfort. Variable speed systems are quiet, keep humidity precisely controlled, and make your home feel genuinely different—cooler air, less noise, no blast of cold when the system kicks on.
Many homeowners who upgrade to variable speed say they notice it immediately.
4. Furnace Options
If your home has natural gas service, you have two furnace efficiency tiers to choose from.
80% (Standard) Furnace
An 80% furnace means 80 cents of every dollar of gas you burn goes toward heating your home. The remaining 20% exits through a metal flue pipe in your roof as exhaust.
These systems are simpler, less expensive upfront, and easier to service.
90%–99% (High Efficiency) Furnace
High efficiency furnaces extract so much heat from the combustion process that the exhaust gases are cool enough to vent through PVC pipe rather than metal flue.
Only 1%–7% of the heat generated is lost.
Staging Options on Furnaces
Just like outdoor units, furnaces come in single-stage, two-stage, and variable (modulating) configurations.
A single-stage gas valve is either fully open or fully closed. Two-stage furnaces offer a low and high heat setting.
Modulating furnaces adjust the flame continuously based on demand—paired with a variable speed blower, these systems are the gold standard for even temperatures and quiet operation throughout the home.
5. Brand Guide: The Honest Truth
Homeowners spend a lot of time researching brands. Here’s what actually matters—and what doesn’t.
The Major Brands
- Lennox, Carrier, and Trane are the industry’s top tier. Strong product lines, good parts availability, and broad technician familiarity across DFW.
- Amana (Daikin) has made significant quality improvements and is competitive with the top three, particularly on warranty terms.
- American Standard is manufactured by Trane on the same assembly line. The only differences are the paint color and the louver pattern on the outdoor unit.
Economy Brands
Goodman (Daikin), Ducane (Lennox), OxBox (Trane), and Comfortmaker (Carrier) are the value-tier lines from the same parent companies. They are solid performers for the price, but they omit some of the sound insulation, safety sensors, and refinements found on the premium lines.
The Most Important Thing About Brands
At the end of the day, the quality of the installation and the consistency of the maintenance are the most important factors in how long your system lasts and how well it performs.
A premium brand installed carelessly will underperform a mid-tier brand installed with precision every single time. Don’t let brand loyalty drive your decision at the expense of evaluating who is doing the work.
6. Airflow: The Factor Most Companies Ignore
This is the section most HVAC companies skip in their buying guides—because addressing airflow problems takes more time and expertise than swapping a unit. But it may be the single most important factor in how your new system performs.
Why Airflow Matters
Your air conditioner does not actually “cool” your home. It removes heat. It does that by pulling warm air from your living space through the return ducts, passing it across a cold evaporator coil that absorbs the heat, and blowing the now-cooler air back through the supply ducts into your rooms.
If the ductwork is undersized, leaking, or poorly designed, the system is fighting itself on every cycle. Modern equipment is precisely engineered—the tolerances are much tighter than systems from 20 years ago. A restriction that an older system could muscle through will cause a new system to underperform, run harder than it should, and wear out faster.
Return Air: The Most Common Problem
The most frequent airflow issue we find in DFW homes is insufficient return air duct. The system is trying to pull air back through an opening that’s too small. The result: uneven temperatures, excess stress on the blower motor, and reduced efficiency.
Modern design standards call for a return duct in every room with a door that closes. Many homes—both older builds and newer construction that was bid at the lowest cost—fall short of this.
By the Numbers
A 5-ton air conditioning unit moves approximately 2,000 cubic feet of air per minute.
In an hour, that’s over 9,000 pounds of air moving through your duct system.
When the ductwork is undersized, that’s an enormous amount of air being forced through too small an opening—and your system pays for it every cycle.
Duct Leaks
As ductwork ages, it develops leaks from attic activity, temperature exposure, and material fatigue. Poorly installed ductwork can leak from day one.
Return-side leaks pull hot attic air into the system and create positive pressure in your home, pushing conditioned air out through cracks in the building envelope.
Supply-side leaks blow conditioned air into the attic instead of your living space and create negative pressure, pulling outdoor air in through gaps in your home.
Both scenarios waste energy, hurt air quality, and put unnecessary strain on the system. As part of our installation and maintenance process, we check for these conditions and address them before they become larger problems.
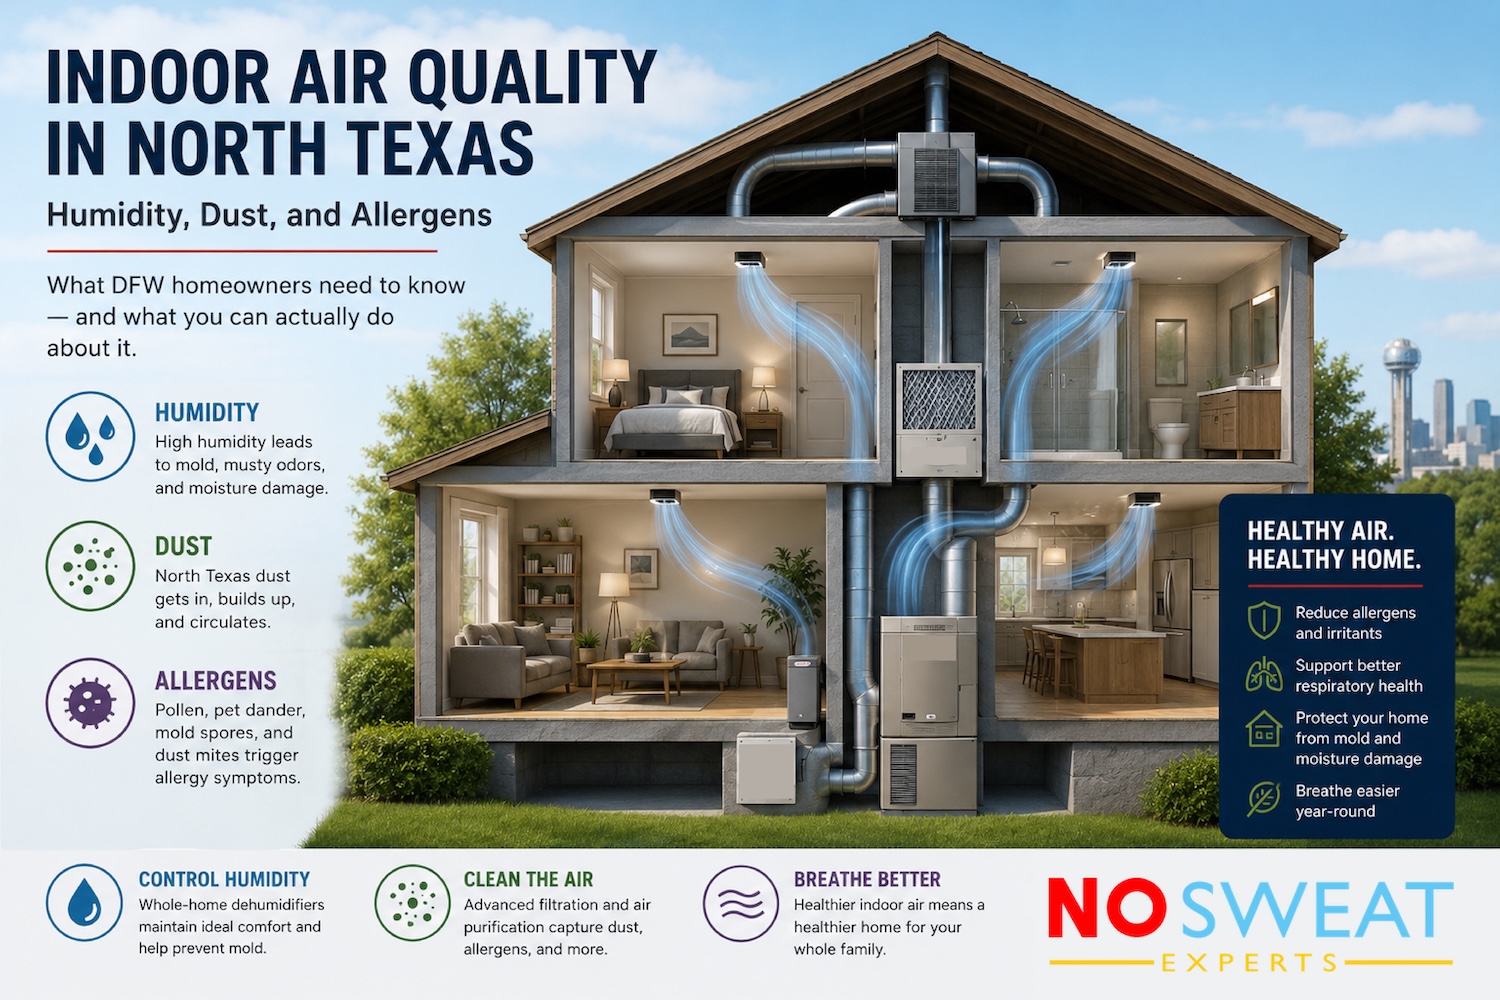
7. Air Quality: What Works and What Doesn’t
First: A Note on Filters
Your air filter’s primary job is to protect the equipment—not to purify the air you breathe. Filters keep dust and debris from coating the evaporator coil and restricting airflow. That’s their function.
Filters with a MERV rating above 10 can begin to restrict airflow enough to reduce system efficiency. Do not buy high-MERV filters with the intention of improving your air quality—the tradeoff isn’t worth it. The best setup is a properly sealed filter box where the filter fits snugly with no air bypassing around the edges.
What Actually Improves Your Indoor Air Quality
UV Lights and Ionizers
These devices release ions into the air that attract fine particles—pollen, dust, VOCs, mold, mildew, and bacteria—causing them to clump together and either fall out of the air or get caught by the filter.
They also work on surfaces throughout the home, not just in the air stream. Everything you smell is a particulate in the air; these products reduce odors at the source.
Electronic Air Cleaners
Electronic air cleaners use an electric charge across the filter medium to capture extremely fine particles—including viruses and bacteria—at a level comparable to hospital-grade filtration. Unlike ionizers, they don’t kill mold or bacteria on surfaces, but they do an excellent job of filtering them out of the air stream. Note: electronic air cleaners are less effective against VOCs.
Fresh Air Ventilation
Fresh air intake is required by code in most new construction. Its purpose is to dilute indoor air and prevent the buildup of VOCs—particularly important in new homes where building materials are still off-gassing chemicals. Fresh air also helps manage CO₂ levels in tightly sealed homes.
Energy Recovery Ventilators (ERVs)
An ERV brings fresh outside air in while simultaneously exhausting stale indoor air—passing both streams through a heat exchanger that pre-conditions the incoming air before it enters your home.
This is the most energy-efficient way to ventilate a tightly sealed home. Commonly found in homes with spray foam insulation.
Whole-Home Dehumidifiers
Dry air feels cooler than humid air. When your home is properly dehumidified, you can often raise your thermostat setpoint by 2–3 degrees and feel just as comfortable—which reduces runtime and extends equipment life.
It’s also important for home health: if indoor humidity is consistently above 60%, you’re providing an environment where mold and biological growth can occur without a specific water source.
What Doesn’t Work: Duct Cleaning
In most cases, duct cleaning is not worth the money—and it can actually cause damage.
Some dust will always accumulate on the inside surface of your ductwork. That’s normal. It stays there because it’s not going anywhere—it’s not the source of dust in your home or the cause of allergy symptoms.
The methods used to clean ductwork can damage the flexible liner, which becomes brittle after years of exposure to 150°F attic temperatures. More damage means more leaks.
Exception: if there is mold in the ductwork, cleaning won’t solve it. The only real solution is duct replacement.
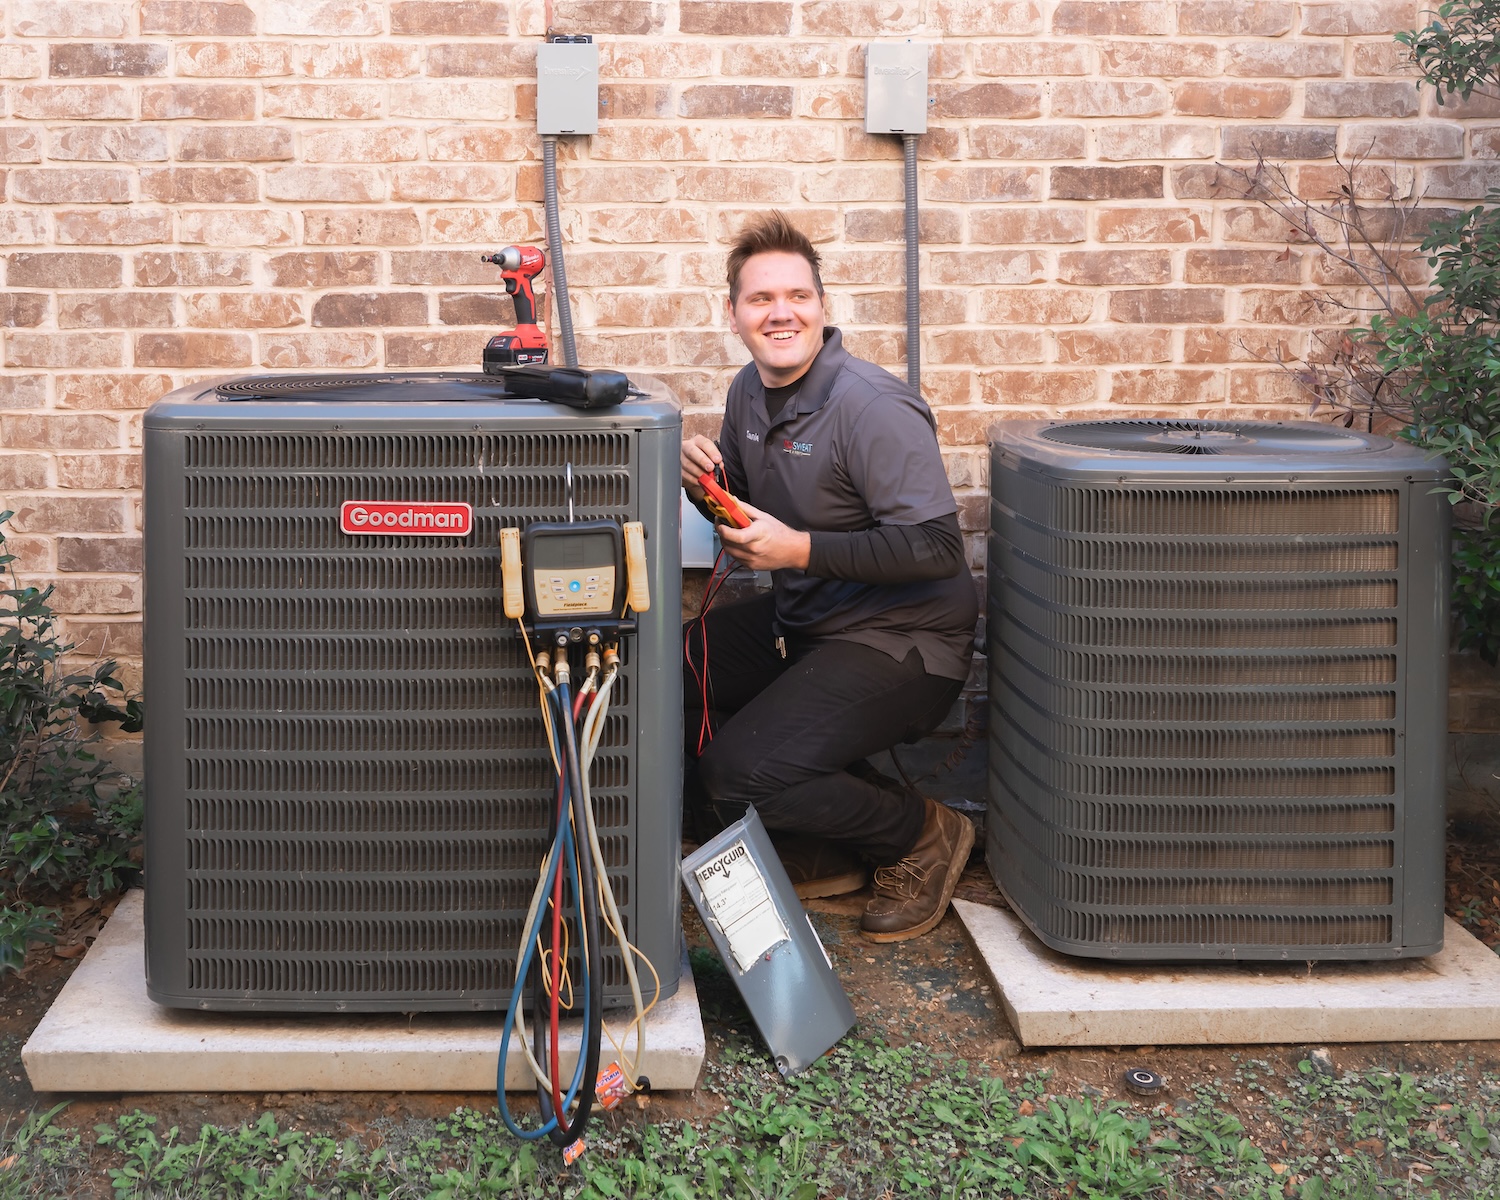
8. Installation: Why It Matters More Than the Equipment
The best HVAC equipment in the world will underperform if it’s installed carelessly. We’ve seen more system failures caused by poor installation than by equipment defects—and we’ve been called in to correct other contractors’ work more times than we can count.
Roy uses this analogy to explain it:
The Two Cars on the Lot
Imagine two identical vehicles sitting at a dealership. Same model, same specs—except one costs $50,000 and one costs $60,000.
The cheaper one was delivered as a box of parts and assembled by a group of guys at an independent shop. The more expensive one was built by the manufacturer’s engineers on their own assembly line.
That context changes everything about which one you’d choose.
HVAC installation is the same. The equipment is one factor. Who installs it, how carefully they do it, and what they check before they leave determines how that equipment performs for the next 15 years.
What No Sweat Does on Every Installation
- Proper sizing for the home’s actual square footage, insulation, and exposure—not just a match to whatever was there before
- Airflow: return and supply duct adequacy, static pressure, and any restrictions that need to be addressed
- Drainage: condensate lines cleared, properly sloped, and routed correctly
- Refrigerant charge: verified by measurement, not by assumption
- Electrical: correct amperage, proper disconnect, surge protection
- System startup and performance verification before we leave
9. The No Sweat Warranty
On most installations—outside of economy-tier equipment—we offer a 10-year parts and labor warranty to customers who opt in. That means if something fails within 10 years, we cover both the part and the labor to replace it.
That kind of warranty is a commitment on our end. We only offer it because we stand behind the quality of our installations.
Standard Inclusions on Every No Sweat Installation
- Supply and return plenums with balancing dampers
- Surge protector on the outdoor unit
- Smart thermostat installation and setup
- Properly hung and secured refrigerant lines
- Full system performance verification before job completion
- Walkthrough with homeowner on system operation and filter maintenance
Ask us about optional add-ons: UV/ionization systems, whole-home dehumidifiers, electronic air cleaners, and ERV ventilation.
10. Maintenance: Protecting Your Investment
Your HVAC system is the most expensive appliance in your home. Treating it like a set-it-and-forget-it purchase is one of the most common—and costly—mistakes homeowners make.
Regular maintenance does three things: it catches small problems before they become expensive ones, it keeps the system running at peak efficiency, and it’s often required to maintain manufacturer warranty coverage.
What Our Maintenance Visits Include
Our maintenance visits cover more than 100 points of inspection, observation, and testing. Every visit includes:
- Refrigerant level check and leak inspection
- Electrical component inspection: capacitors, contactors, wiring, and connections
- Blower motor and fan blade inspection and cleaning
- Evaporator and condenser coil cleaning when needed
- Condensate drain flush and inspection
- Thermostat calibration and system controls check
- Filter replacement (filters included in plan)
- Full system performance verification
We spend approximately one hour on each system at every visit. This is not a 20-minute windshield check.
11. DIY Maintenance: What You Can Do Between Visits
There are three simple tasks that make a real difference in how your system performs between professional maintenance visits.
1. Change Your Filter on Schedule
This is the highest-impact thing a homeowner can do. A clogged filter restricts airflow, which forces the system to work harder, reduces efficiency, and shortens equipment life.
- 1-inch filters: replace every 1–3 months, depending on dust levels and pet activity in the home.
- 4-inch filters: replace every 4–6 months.
Use a filter in the MERV 8–10 range. Higher-rated filters restrict airflow more than the benefit they provide.
2. Keep the Outdoor Unit Clean
The side of the outdoor unit closest to your home tends to collect the most debris. Grass clippings, cottonwood, and dust accumulate on the coil fins and restrict airflow across the condenser.
A gentle rinse with a garden hose—spraying from the inside out if possible—keeps the coil clear. Do this a few times a season. Do not use a pressure washer; the fins are delicate.
3. Maintain Your Condensate Drain
Your indoor unit produces condensation as it removes humidity from your home. The primary drain line routes that water to a nearby sink or utility drain. If the primary line clogs, water backs up to a secondary emergency drain line—which is routed to the exterior of your home specifically to alert you that the primary is blocked. If you see water dripping outside near your foundation or roofline on a day when your AC is running, that’s your system telling you the primary drain needs attention.
Pour about half a cup of white vinegar or bleach into the primary drain line access port every one to three months. How often you need to do this depends on the slope and design of your drain line—some homes need it monthly, others twice a year. When in doubt, do it quarterly.
12. Whole-Home Energy Analysis
An HVAC system doesn’t operate in isolation. How well your home is insulated, sealed, and ventilated directly impacts how hard your system has to work—and how consistently it can keep your home comfortable.
As part of our process, we can scan your home with a thermal imaging camera to identify areas of heat loss, air infiltration, and insulation gaps that aren’t visible to the naked eye.
Attic Insulation
The U.S. Department of Energy divides the country into insulation zones. Most of North Texas falls in Zone 2 or Zone 3, which requires a minimum of R-38 attic insulation—roughly 14 inches of blown fiberglass.
In our experience, a significant number of DFW homes are well below this threshold. In some cases, the required amount was never installed. In others, the insulation has settled and compacted over time, losing effective R-value as it loses depth.
Bringing attic insulation up to code standard is one of the highest-return improvements a homeowner can make—it reduces runtime, improves temperature consistency throughout the home, and extends equipment life.
Ask Us About a Whole-Home Analysis
If you’re purchasing a new system or evaluating persistent comfort issues in your home, ask us about a full thermal scan and home efficiency assessment.
We’ll identify insulation gaps, air leaks, duct problems, and airflow restrictions—and give you a clear picture of what’s worth addressing and what isn’t.
Questions? Ready to schedule?
We serve homeowners across the DFW metroplex—Frisco, Prosper, Celina, McKinney, Allen, Plano, Dallas, and surrounding areas—as well as the Austin metro.
Our standard diagnostic fee is $79. Second opinions on systems another company has declared dead are always free.
We work Monday through Saturday, with same-day service available. No emergency surcharges.
No Sweat Experts | DFW & Austin Metro | TACLA Licensed | EPA Certified | Monday–Saturday, Same-Day Delivery